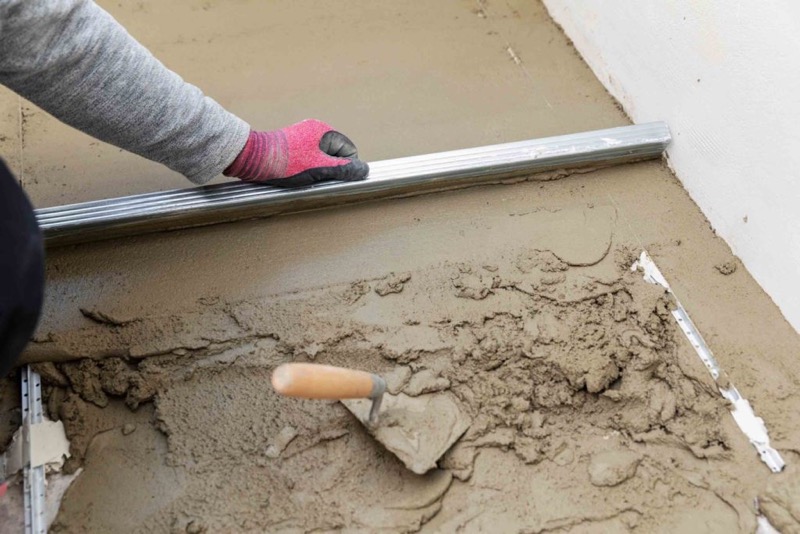
Liquid screed is a relatively new way to create level flooring in readiness for floor finishes or tiles. It is an affordable, fast and effective method to prepare floors in commercial and residential buildings and provides many advantages. Especially when combined with underfloor heating, liquid screed is ideal for evenly distributing warmth throughout the floor.
UK Screeds LTD are trusted experts for installing liquid screed in Bristol. But once we have finished our job, there are a few things you should keep in mind. In this post, we’ll cover everything you need to know about the aftercare your liquid screed flooring requires after installation.
Mind the Traffic
Liquid screed is so prevalent in part because of its fast drying times. Within 24-48 hours of installation, it can already accept light site traffic, and you can occasionally step over the screed flooring as soon as the following day after installation.
However, total site traffic should be avoided for two to three days.
If you have to access the area more frequently, we advise protecting the floor with plywood sheets. Remove these quickly again to permit the floor to dry properly.
Curing
Your liquid screed floor is also curing within the same period as the drying. This is why the area should ideally be closed to all traffic. Usually, it isn’t necessary to use traditional curing methods like impermeable membranes. Nonetheless, you should take care to avoid rapid loss of moisture during those first 24-48 hours.
This is especially important if you haven’t yet installed doors and windows. Provide temporary covers for these openings. You should also avoid direct sunlight during the curing time, so we encourage you to cover any glass doors or windows with a southern aspect.
After 48 hours have passed, you can open the area up to the world again!
Sanding
When Liquid Screed dries, a thin layer of laitance remains on the top as the water evaporates. This layer should be removed before you start tiling or applying any finishes to your new floor. After 7-10 days, we recommend sanding the floor down to provide a stable surface for your tiles or floorboards.
The sanding should be completed using an orbital sanding machine with a vacuum integrated. Note that this process won’t remove screed depth!
All dust and debris need removing before installing your floor coverings. Otherwise, the sanding dust might affect the adhesion of your primer and your chosen floor covering. It’s worth getting industrial equipment for this job if you do it yourself. A standard home vacuum cleaner will often fail to remove dust as an industrial vacuum can.
UK Screeds LTD can sand your flowing screed in Reading, so just give us a call if you’d like our assistance with this critical step of liquid screed aftercare.
Commission Underfloor Heating
If you’re looking to install underfloor heating, the right time is before any final floor finishes are applied. This ensures that all remaining moisture is forced out of the deep screed. In addition, it can adjust to thermal movement before the final priming and floor coverings are installed.
You should always commission underfloor heating at floor temperatures. Maintain this for 24 hours before raising it by five degrees each day until the optimal running temperature is reached. Once you’ve maintained this temperature for a week, you can gradually reduce it back to the starting point. And let the system cool for another two days to allow for a final moisture test.
Did you know: We also have a wide range of underfloor heating systems available? Check out our installation services on our website.
Priming
Another step following the sanding of your floor is to apply a primer. Finally, make sure you have completed a moisture test using a digital hygrometer or oven test to ensure your liquid screed has dried sufficiently.
Use a calcium sulphate compatible primer for your flooring once it has completely dried to the recommended level of moisture.
A primer stops the adhesives from drying too quickly, which strengthens the floor. A primer can also help ensure that the floor is in no way porous, so it won’t be damaged by any water that might get to it in the future.
To ensure this, look for adhesives labelled anhydrite and calcium sulphate compatible, and check with your chosen suppliers what the best primer for your floor might be.
Leave the Care and Preparation of Your Liquid Screed Flooring to the Pros
Getting flooring precisely right can be a frightening prospect. After all, you want to ensure that no issues arise years down the line when you might have to take tiles or floorboards back up again.
Luckily, you don’t have to tackle this process alone. If you choose UK Screeds LTD to work with you on your liquid screed flooring project, we’ll be with you every step of the way. Our experts not only install your floor and underfloor heating but also prepare it in readiness for your chosen floor covering.
Get in touch with us today for your liquid screed in Bristol.


